The following example illustrates how the formula plug-in can be used.
The aim is to calculate a checksum for a message and the respective signals. A real ECU is not required, testing the checksum as well as an identified transmission failure can be simulated.
In this example, the following messages and signals are used:
Message |
Cycle time |
Signal |
Position in message |
Value range |
Data-Packet |
100 ms |
Signal1 |
0 to 15 |
0 to 65535 |
Signal2 |
16 to 23 |
0 to 255 |
||
Signal3 |
24 to 35 |
0 to 4095 |
||
Signal4 |
36 to 47 |
0 to 4095 |
||
Signal5 |
48 to 55 |
0 to 255 |
||
Checksum |
56 to 63 |
0 to 255 |
||
Display |
10 ms |
FaultChecksum |
0 |
0 to 1 |
First, the formula plug-in is loaded using the context menu of the tree inside the main window. All subsequent formulas are entered here. You can copy & paste the formulas from here.
Formula No. 1
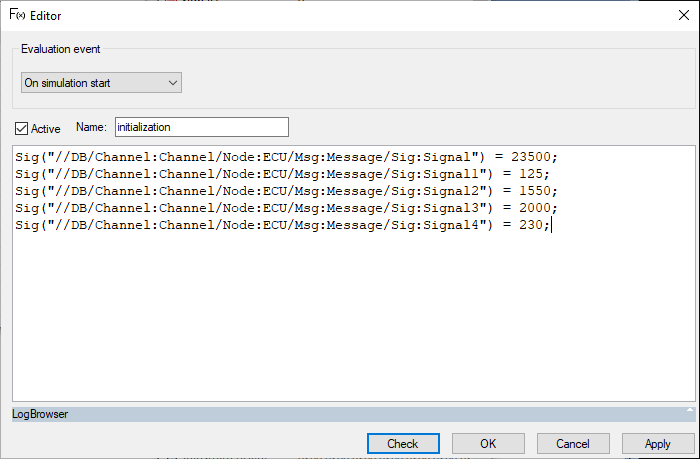
The formula editor is opened by double-clicking on the blank input, in which the first formula is entered:
Formula No. 2
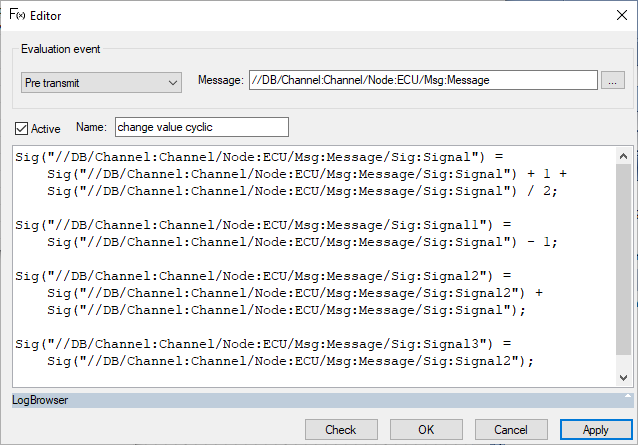
The next formula changes signal values cyclically to continuously make new message data available.
Formula No. 3
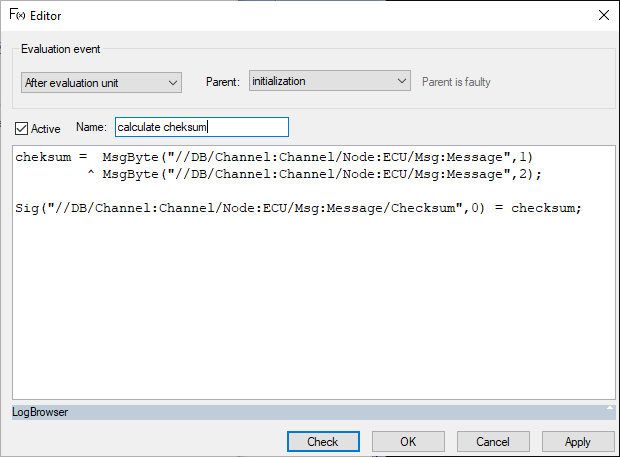
Likewise, the checksum is calculated before sending. The checksum is generated by performing an exclusive-OR operation on the first seven message bytes. The result is assigned to the signal “Checksum” which is stored in the eighth message byte (ignored when calculating the checksum).
Formula No. 4
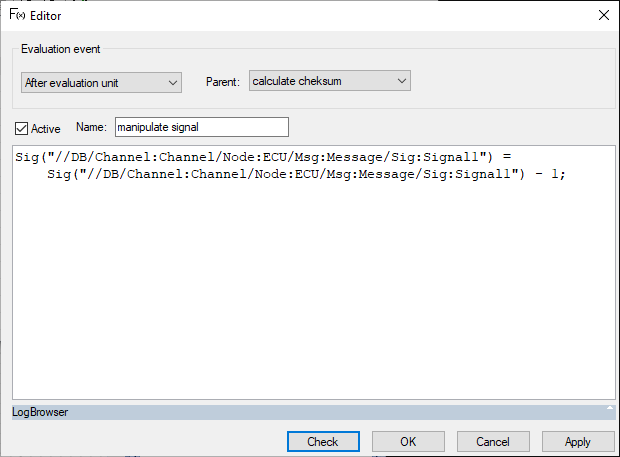
The following formula manipulates Signal1 after the checksum has been calculated, resulting in an error when the checksums are compared. This formula is not to be evaluated initially, thus the “Active” box is unchecked.
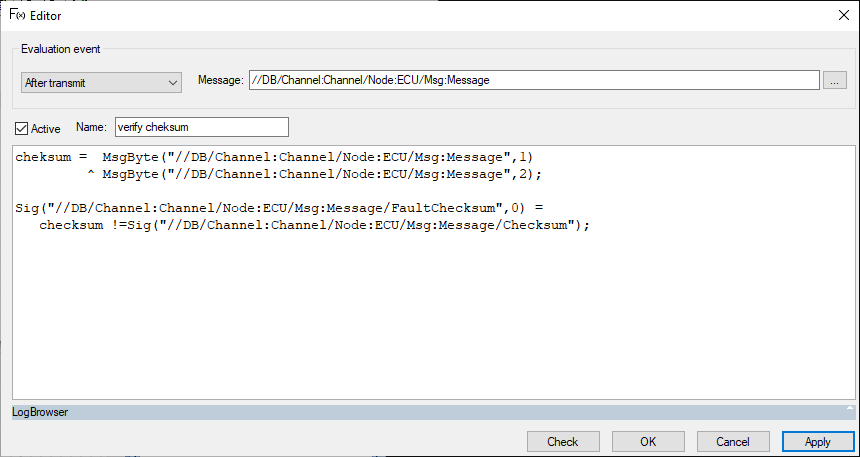
Formula No 5
The following formula is evaluated after sending the message. This simulates checking after receipt of message (the evaluation time “on receipt” can be used only if messages are sent from a real ECU).
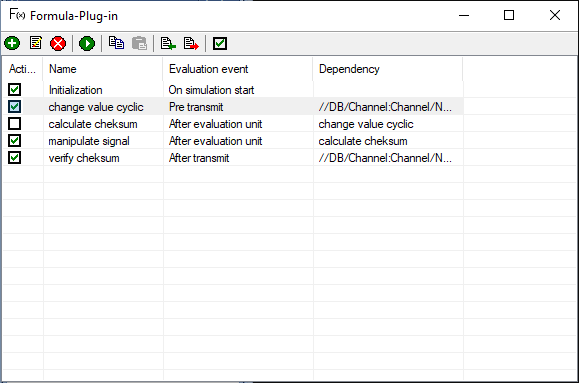
When all formulas have been entered, the following overview is displayed in the main window:
Next, simulation can be started. During simulation, formula no. 4 (manipulation of message data) can be activated by checking the respective checkbox. The following figure shows a plot of all signals:
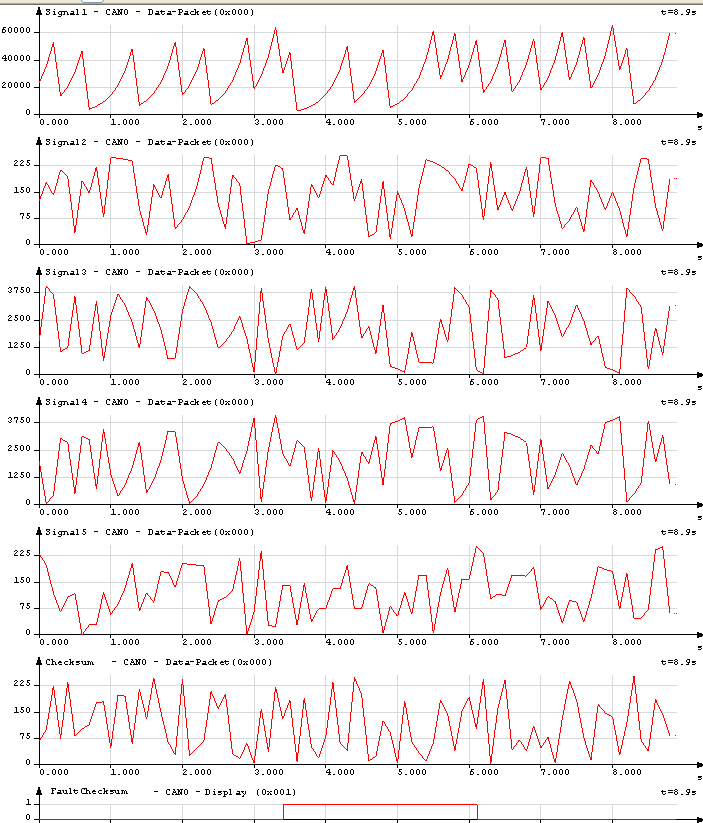
Signal values are changed by formula no. 2 after they have been set to an initial value by formula no. 1 at simulation start. After approx. three seconds, formula no. 4 is activated to manipulate message data. Signal curve “ChecksumError” at the bottom shows that an error is identified and the signal’s value changes to “1”. Six seconds after simulation start, formula no. 4 is reactivated and the checksum is again identified as correct.
