This tutorial demonstrates how you can automate application flow on the bus with the help of VBA. For this project, you will use the integrated VBA environment.
Before taking the tutorial, a suitable data base must be created:
•Create a new bus named “CAN1” via the context menu of the data base.
•Create an ECU named “ECU1” in this bus.
•For this ECU, create a message named “MSG1” with the ID 0x001.
•Create a signal named “SIG1” inside the message.
•Open the signal editor and set the signal to a length of 8 bits.
•In the “scale” section, set the maximum to 255.
Next, create a VBA macro by selecting New in the context menu of the VBA node inside the tree view.
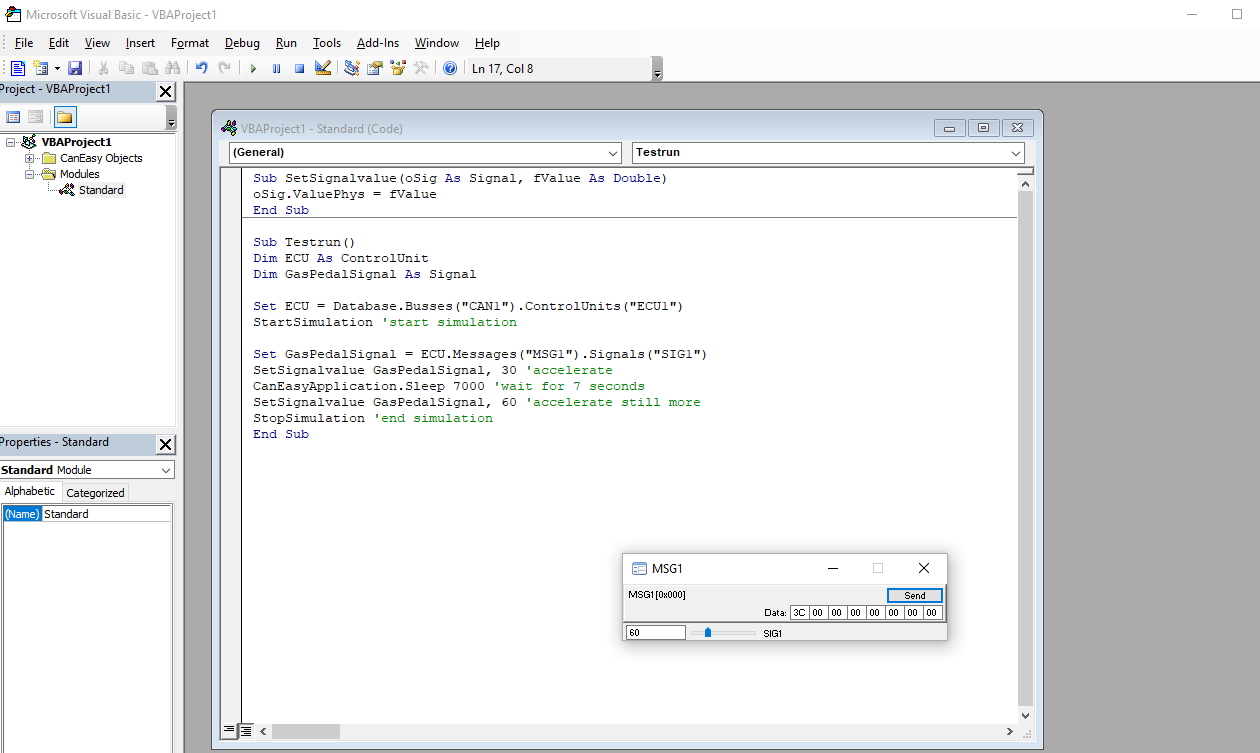
A new macro project is created and the VBA environment launches. Enter the following code:
Sub SetSignalvalue (oSig as signal, fValue as double) oSig.ValuePhys = fValue End Sub
Sub Testrun() Dim ECU as ControlUnit Dim GasPedalSignal as Signal
Set ECU = Database.Busses(“CAN1”).ControlUnits(“ECU1”) StartSimulation 'start simulation
Set GasPedalSignal = ECU.Messages(“MSG1”).Signals(“SIG1”) SetSignalvalue GasPedalSignal, 30 'accelerate CanEasyApplication.Sleep 7000 'wait for 7 seconds SetSignalvalue GasPedalSignal, 60 'accelerate still more StopSimulation 'end simulation End Sub |

Switch to CanEasy’s main window: New nodes were automatically inserted in the VBA branch of the tree. Expand the VBA branch and select the menu item Save from the context menu of project node VBAProject1.
Select the file name “Tutorial” to save the macro project.
Now, the written macros will be used: Open the panel containing the created message and locate the respective signal inside the panel. To execute the second macro, select the command Start from the context menu of macro Testrun.
Observe the signal in the panel. Initially, the value will be set to 30. After seven seconds, the signal value is set to 60.