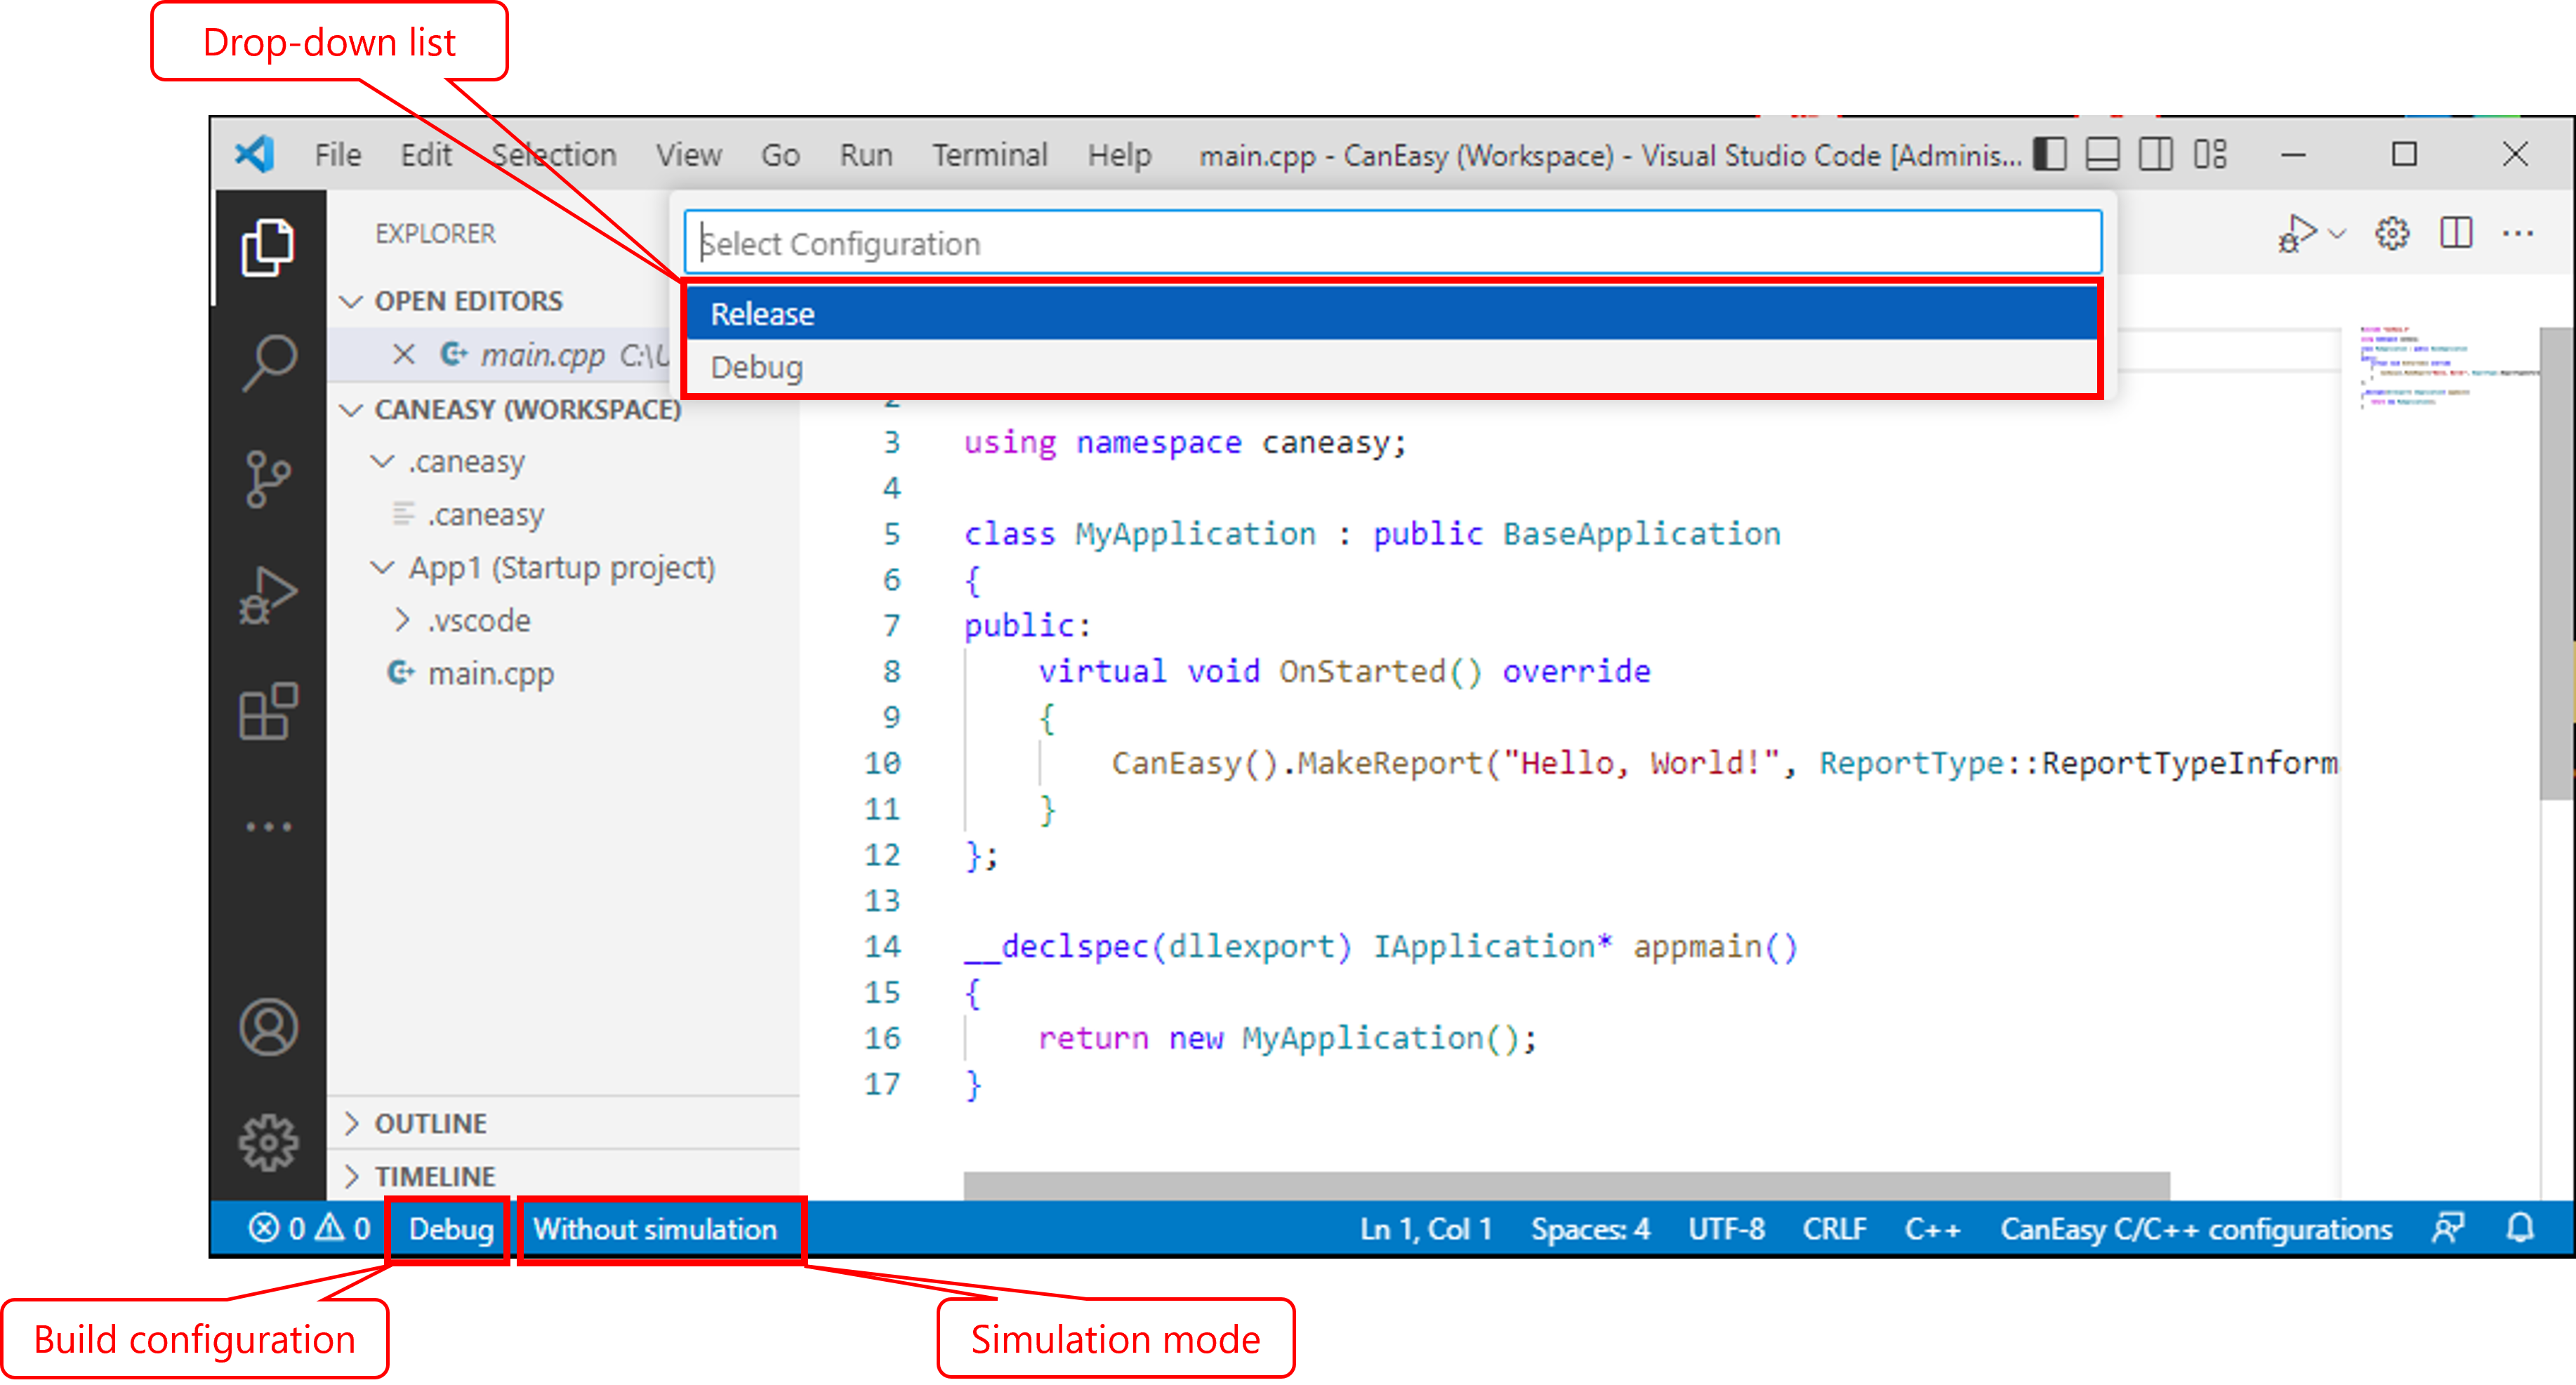
The user interface for working with CanEasy includes settings in the status bar of Visual Studio Code,
commands from Visual Studio Code Explorer and commands from the F1 drop-down list.
Build configuration is set from the status bar.

Build configuration can be set as one of the following
•Release – supports debugging application in Visual Studio Code, load and launch of debugged applications in CanEasy.
•Debug – like Release, but with more debug information in Visual Studio Code.
•NonBlockDebug (CAPL and Cpp) – debug configuration which doesn’t block work of the others applications.
Click on the name of the existing configuration for changing build configuration in the drop-down list.
The Python applications don’t compile. Build configuration isn’t set for them.
The building options can be changed in file “application.json”.
Simulation mode is set from the status bar.
Simulation modes in the CanEasy can be set as one of the following
•Without simulation - simulation doesn’t start when debugging is started in Visual Studio Code.
Simulation can be started and stopped manually from the CanEasy main menu.
•Start simulation - simulation starts when debugging is started in Visual Studio Code.
Simulation is stopped when debugging is stopped in Visual Studio Code.
Click on the name of the existing configuration for changing simulation mode in the drop-down list.
Simulation modes isn’t set for the CAPL applications.
"Start simulation" mode is always turn on for CAPL application.
Building of the project which selected in Explorer is done by the command “Run Build Task” from the Terminal context menu.
Information about building and its results appears in the Output tab.
Commands “Build all projects” and “Re-build all projects” of the CanEasy workspace can be called from the context menu any project in Explorer.